Brioche Stitch
Table of Contents
What is Brioche Stitch?
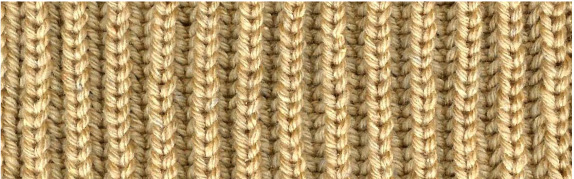
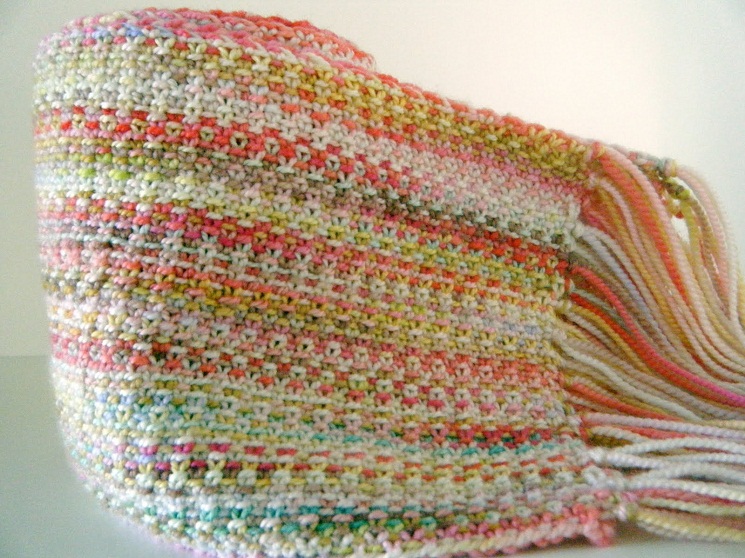
Brioche Stitch is a type of knitting pattern which is worked on by combining various stitches. It forms a nice ribbed pattern and produces a thick, soft fabric. This knitting pattern is used for making various hand woven articles such as mufflers, scarves, cardigans, blankets and hats. You can both crochet it and knit it with knitting needles of any size.
The procedure of kitting the stitch is quite difficult as it is an advanced technique. It is one of the most popular stitches around the world as it creates a reversible fabric having two identical sides. If you are an experienced knitter looking for a unique knitting pattern for making a warm scarf or a baby blanket, Brioche Stitch can be the ideal option for you. You can learn how to work on this stitch from the step by step instructions given in this article.
It is also referred to as the English Ribbing Stitch and is closely associated with the Stockinette Brioche Stitch and Half Brioche Stitch.
Directions for Knitting Brioche Stitch
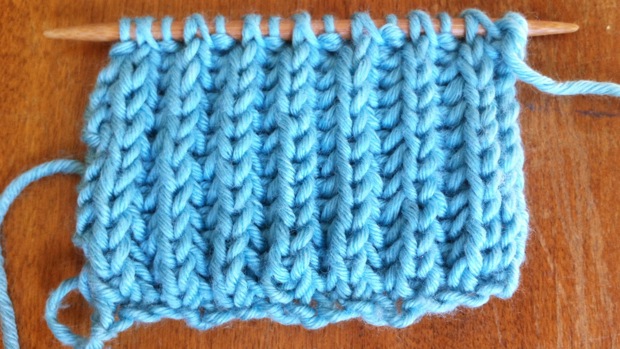
It is necessary to know all the basic knitting techniques before you can attempt this stitch. Once you are comfortable knitting the basic Brioche Stitch, you can advance to knitting two-colored patterns with it. Following are instructions for working on the basic pattern:
- Cast on the desired number of stitches, but it has to be an odd number as this pattern has to be worked on odd number of stitches. It is advisable to use number knitting needles and a worsted weight yarn.
- Then, begin by slipping one as if to purl with yarn in the back. This will be the border on the edges of the knitted piece.
- In the next stage, slip one yarn over (sl 1 yo). This is the initial brioche pattern stitch. Next, you have to bring the working yarn to front of the work and then slip 1 stitch from your left needle to your right needle. You also have to bring your working yarn over the needle simultaneously for making a yarn over.
- Then, you need to knit 1 before slipping 1 yarn over again. Repeat in this process across the entire setup row and end with a knit 1.
- In the next step, knit the first row of the pattern. For this, you need to slip one stitch as if to knit and then brioche knit 1 (brk1). Then, knit the 1 slipped stitch and yarn over previous row together like 1 stitch. Slip 1 yarn over (like in the third stage) and then brioche knit 1. This has to be repeated across the row, finishing with brioche knit 1 followed by a regular knit 1.
- Continue by knitting two rows of brioche pattern. Then, slip 1 stitch as if to knit and then slip 1 yarn over. Then you need to brioche knit 1 and slip1 yarn over. This procedure has to be repeated across the row, finishing with slip 1 yarn over followed by a regular knit 1 stitch.
- You need to repeat the rows 1 and 2 until your knitted piece reaches the desirable size and length. While binding off, you need to work all “slip 1 yarn over” stitches as 1 stitch.
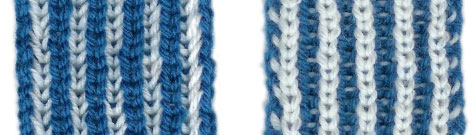
How to Work Brioche Stitch with Two Colors?
It is advisable to use double pointed or circular needles for knitting this pattern. They allow you to work on the stitches without turning your work as you can simply slide the stitches to the opposite tip of the needle. You can use either an even or an odd number of stitches for this technique. The procedure varies slightly depending on the number of stitches.
2-Colored Pattern Using Even Number of Stitches
Cast on loosely an even number of stitches with the main color (MC) to begin this pattern. Do not turn your work.
- Foundation Row right side (RS) contrast color (CC) to form purl columns in the CC on the RS: Slide the stitches to the opposite needle tip and attach CC with yarn in front (wyif), starting with slip 1 purlwise, yarn over, yarn to front (sl1yof) followed by purl 1 (p1). Repeat procedure from the start and turn the work.
- Row 1 wrong side (WS) main color: This row is knitted for purl columns in main color. Start with yarn in front, then slip 1 yarn over and brioche purl 1. Repeat this row from start. Do not turn your work.
- Row 1 wrong side contrast color: It forms the knit columns in contrast color. To begin, slide the work to the opposite tip of your needle and start with brioche knit 1 (brk1), yarn front and slip 1 purlwise, yarn over, yarn to front. Repeat from brk1. Turn the work.
- Row 2 right side main color: It creates knit columns in the MC. Hold the contrast color yarn under the left needle to back for maintaining the yarn over of the last worked stitch. Work with the main color yarn *brk1, yarn over and then slip 1 yarn over. Repeat from *. There is no need to turn the work.
- Row 2 right side contrast color: This row forms the purl columns in contrast color. Slide your work to the opposite tip of the needle where the CC in hanging. Now knit with the contrast color with yarn in front and start by slipping 1 stitch purlwise, yarn over, yarn to front (sl1yof), brp1. Repeat from sl1yof. Maintain the yarn over of the previous stitch to end with a brioche purl. Turn the work.
- Continue knitting by repeating the rows one and two RS and WS.
2-Colored Pattern Using Odd Number of Stitches
To start, cast on an odd number of stitches loosely with the main color. Do not turn the work.
- Foundation row right side (RS) contrast color: Slide the work to the other needle tip to attach contrast color with yarn in front and slip 1 purlwise, yarn over, yarn to front (sl1yof). *Purl 1 and again sl1yof. Repeat from *. Turn your work.
- Row 1 wrong side (WS) main color: Hold the contrast color yarn under your left needle to back for maintaining the yarn over of the previously worked stitch. Then brioche purl 1 and * slip 1 purlwise, yarn over, yarn to front followed by another brioche purl 1. You need to maintain the yarn over of the previous stitch to be able to end with a brioche purl. Do not turn your work.
- Row 1 wrong side contrast color: slide the stitches to the opposite tip of the needle. Slip the first stitch purlwise and yo (yarn over) as the CC yarn is hanging to front side after first stitch. Then * brk1, yarn over and sl1yo. Repeat from *. Turn the work.
- Row 2 right side main color: Hold the CC yard under your left needle to back in order to maintain the contrast color yarn over of the last worked stitch. Start working with the main color and work a brioche knit 1. Then *yarn to the front, sl1yo and brioche knit 1. Repeat from *. The yarn over of the previous stitch may look separated from its st, so make sure to locate the right stitches before you brioche knit them together. Do not turn your work.
- Row 2 right side contrast color: Slide your work to the opposite tip of the needle where you left the CC hanging. The yarn is hanging back, so bring it to the front under the needle. Now with the contrast color yarn, work slip 1 purlwise, yarn over, yarn to front, *brp1, sl1yof. Repeat from *. Turn the work.
- Continue knitting by repeating rows 1-2 both RS and WS.
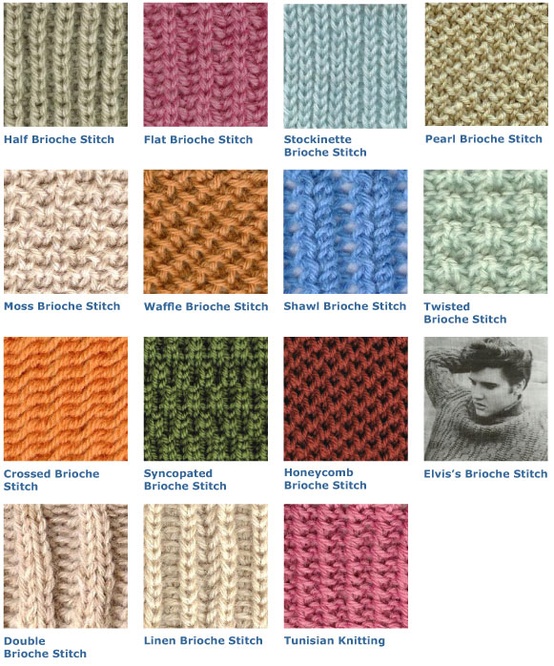
Brioche Stitch Variations
There are a number of variations of this knit pattern. These can be worked with different colored yarns and using different needle sizes. Here are the names of a few varieties:
- Half Brioche
- Pearl Brioche
- Stockinette Brioche
- Flat Brioche
- Moss Brioche
- Honeycomb Brioche
- Crossed Brioche
- Double Brioche
Brioche Stitch in the Round
You can make attractive knitted objects like hats using this stitch. It is quite simple to knit Brioche Stitch in the round. You can learn how to do it using 2 colors by reading the following instructions:

- Round 1A (with yarn A): *Yarn over slip (YOS), purl 1. Repeat from * until the end of the round. Leave this yarn hanging at the front of the work and continue knitting with yarn B.
- Round 1B (with yarn B): *knit two together (Yarn over from the last round + the following stitch), Yarn over slip. Repeat from * until end of round. Leave this yarn hanging at the back of your work, continuing working with yarn A.
- Round 2A (with yarn A): *Yarn over slip and purl 2 together (yarn over from the last round + the next stitch). Repeat from * until end of the round. Leave this yarn in front of your work.
- Round 2B (with yarn B): * Knit 2 together (yarn over from the last round + the following stitch), Yarn over slip. Repeat from * until end of the round. Leave this yarn at the back of your work.
- Repeat 2A and 2B until your fabric reaches the desired size and length.
Now you can go and try this attractive and easy knitting pattern to weave anything you want from baby blankets to sweaters. This interesting pattern makes your knitting project fun to work on while creating a nice, thick fabric for your woven piece of garment.
Related Articles

Join Our Mailing List
Sign up to get the latest updates, along with fresh patterns and tutorials, right to your inbox