Herringbone Stitch
Table of Contents
Herringbone stitch is a popular and attractive knitting technique which has been used over a long period of time. It was illustrated in minute detail by the well-known Italian painter Giotto in the 14th century. He painted this stitch as the borders of the garments in his painting.
What is the Herringbone Stitch
Herringbone is a very old stitch that does not require a sewing machine and has a number of variations. It is quite easy and can be used in knitting or as a simple embroidery design. You can also crochet this stitch for producing a thick and dense fabric. All the varieties of the stitch create regular crossed zigzag lines. It is also referred to by other names such as Persian stitch, Mossoul stitch, Russian cross stitch, witch stitch and plaited stitch.
What is Herringbone Stitch used for?
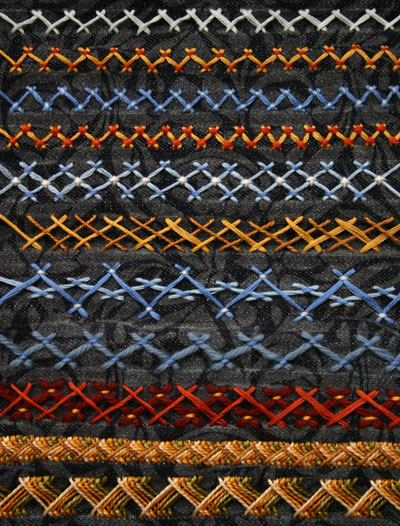
This is a versatile stitch which can be used for couching cords, ribbons and heavier threads and can also be laced with various contrasting threads. It is often used as the foundation row for other more complex stitches as well. Herringbone, along with its different varieties, is commonly used in crazy patchwork. The stitch is sometimes used on embroidered curtains as well. It is often used for lacing leather steering wheel covers together.
How to Work Herringbone Embroidery Design
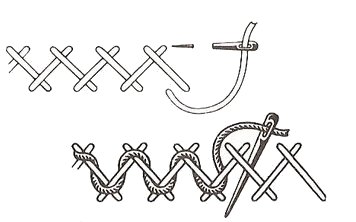
It is worked from the left to the right side along parallel lines. You need to mark guidelines on the fabric so that the width of all the stitches remains even. You can use a water-dissolvable or fade out pen for this purpose.
To commence the stitch, the needle has to be brought out on the left of the line marked to be worked. Then you have to make one small stitch on upper line pointing towards the left. The thread has to be kept below the needle so that it can be pulled through the fabric. Then the thread has to be inserted on the lower marked line, slightly to the right, to make a small stitch pointing to the left. The needle has to be pulled through the fabric, keeping the thread above your needle.
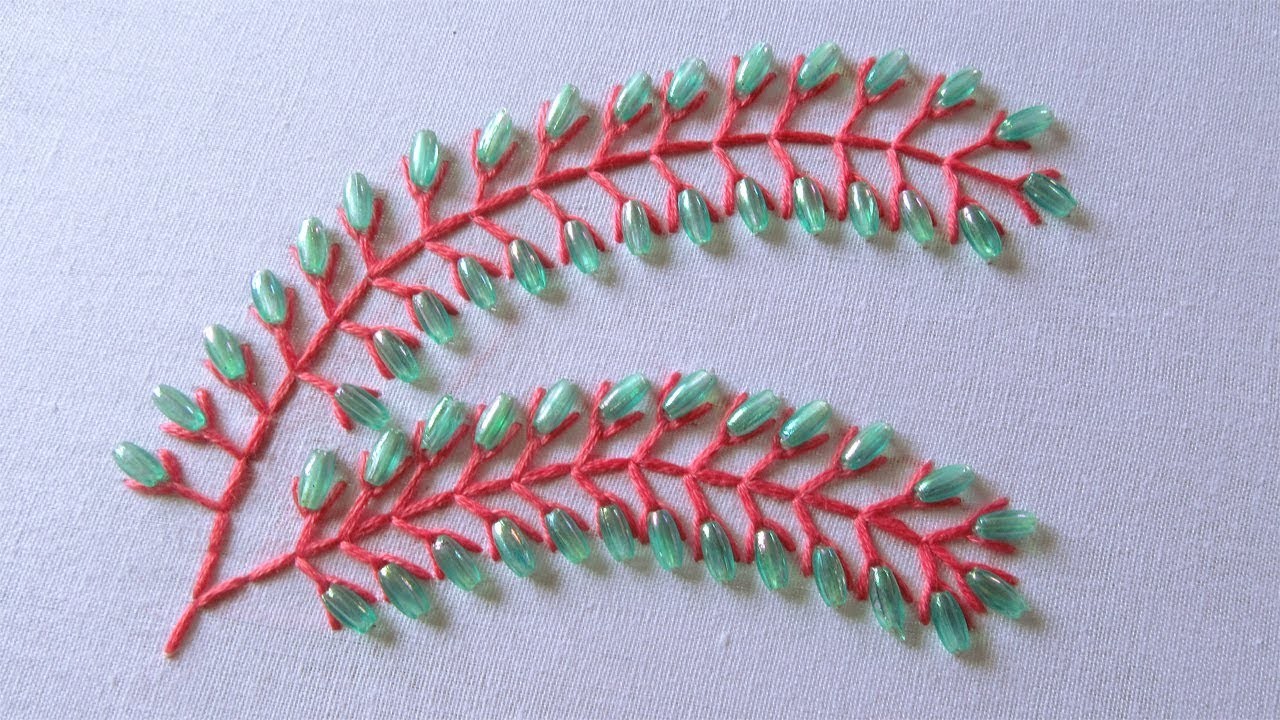
You can work this stitch closely together to create a thick line or can space them further apart to form a loose line.
It can also be used for creating a wide two-colored band. For this, you have to use the double Herringbone Stitch. The directions for working double Herringbone Stitch is similar to the basic Herringbone, but it is worked in 2 passes. This variety of the stitch is most commonly worked with two different colors of thread.
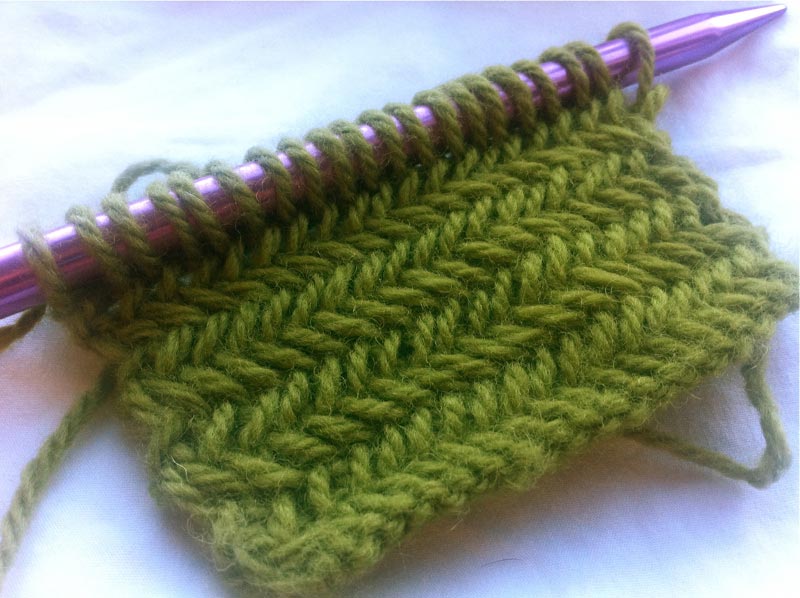
How to Knit Herringbone Stitch?
It is also popular as a knitting pattern and is often used for weaving sweaters, hats and neck warmers. You can knit the pattern quite easily by following a few easy steps. It can be knitted on any number of stitches, but you have to keep in mind that you will be working with two stitches at a time for this pattern.
For this pattern, you have to know the techniques of knit 2 together (K2tog) and purl 2 together (p2tog).
Row 1 (Right Side): In this row you have to slip 1 purlwise, knit 1. Then K2tog through back loops, slipping only the first of the two stitches off the needle. The second stitch will remain on your left needle. Repeat in this way until you have only one stitch left on the left needle. This last stitch has to be knitted normally through back loop.
Row 2 (Wrong Side): This row commences with slipping 1 purlwise, knit 1. Then P2tog, but like row one, slip just the first stitch of the two off the needle. This leaves the second stitch on the left side needle. Repeat this procedure until there is only a single stitch remaining on your left needle. This stitch has to be purled in the normal manner.
Row 3 (Right Side): Repeat like the first row.
Row 4 (Wrong Side): Repeat like the second row.
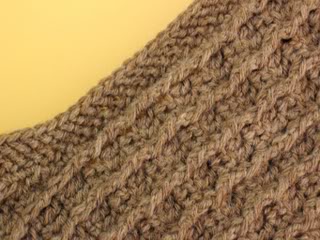
Herringbone Stitch Crochet
There are two main varieties of this stitch on crochet: the Herringbone Double Crochet and Herringbone Half Double Crochet.
Herringbone Double Crochet
To begin, chain the desired number of stitches plus two more. Then yarn over, inserting the hook into the third chain from the hook. Yarn over again, pulling through the chain and through the first loop on the hook. In the next chain, yarn over, drawing through 1 loop on the hook and then yarn over again to draw through 2 loops on the hook. Repeat from the beginning in each chain until the end of the line.
In the second row, chain 3 and turn (counting as first). Yarn over to insert the hook into the next stitch and then yarn over again to pull through the stitch and through the first loop on the hook. Then, yarn over to draw through 1 loop on the hook, yarn over again to draw through 2 loops on the hook. Repeat the process from start to end, working the last stitch into the previous turning chain. Then, repeat the second step for pattern.
Herringbone Half Double Crochet
To work this crochet you have to chain the desired number of stitches plus 1 more. Yarn over, inserting the hook into the third chain from the hook and then yarn over again to draw through the chain and through the first loop on the hook. Yarn over to draw through both the loops on the hook. Repeat from the beginning in all the chains to end.
Chain 3 and turn (counting as first). Yarn over, inserting the hook into the next stitch and then yarn over again to draw through the stitch and through the first loop on the hook. Yarn over, drawing through both the loops on hook. Repeat from the beginning to the end, working the last stitch into the previous turning chain. Repeat the fourth step for pattern.
Herringbone Stitch in the Round
You can also work this amazing stitch in the round. For this purpose, you have to begin by knitting two stitches together in the normal manner and slide only the first knitted loop off the needle for row one. Then in the second row, start by knitting two stitches together through back loops and slide only the first loop off the needle. Repeat these two rows until your fabric reaches the desired size.
Now that you have learned how to work and knit this beautiful pattern, you can use it the next time you decide to embroider a piece of fabric or weave a muffler by yourself. It is sure to pay off your efforts and make your handiwork look amazing.
Related Articles
Join Our Mailing List
Sign up to get the latest updates, along with fresh patterns and tutorials, right to your inbox