Hardanger Embroidery
Table of Contents
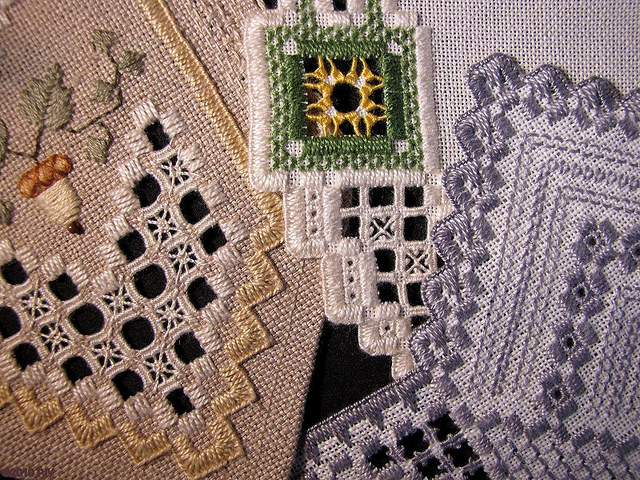
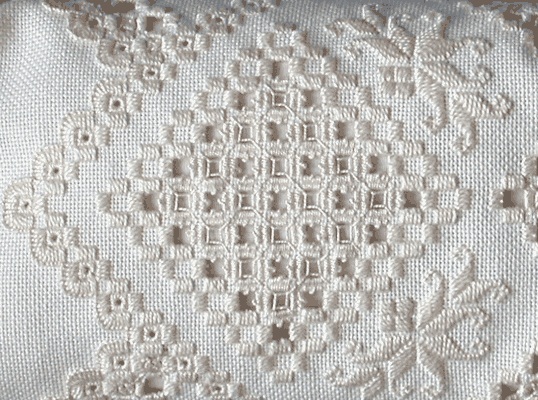
Hardanger Embroidery is one of the oldest and most attractive drawn thread techniques. Here, you will find out more about this embroidery, like how is it worked and what is it used for.
What is Hardanger Embroidery?
Hardanger is a type of needlework that uses the drawn thread and counted thread work techniques. This embroidery has a very long history as it is believed to have originated from the traditional drawn-thread technique developed in Persia during the 7th century. Typically, it is worked with white thread on an evenly wove fabric such as linen. You will find a detailed instruction of how you can work this embroidery easily yourself at home.
Hardanger Embroidery Uses
Before you learn how to work the embroidery, you will probably want to know what you can use it for. It is traditionally used for caps, linens, aprons and other similar articles. It can also be used for making fashionable bags.
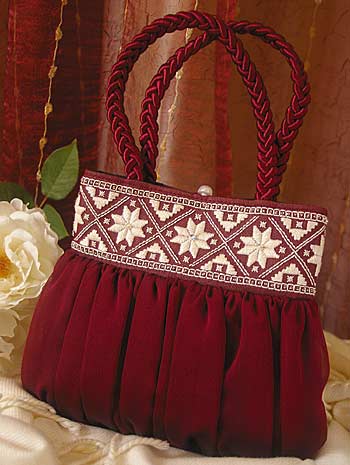
“Copyright © Yvette Stanton, Vetty Creations. Used by permission. http://www.vettycreations.com.
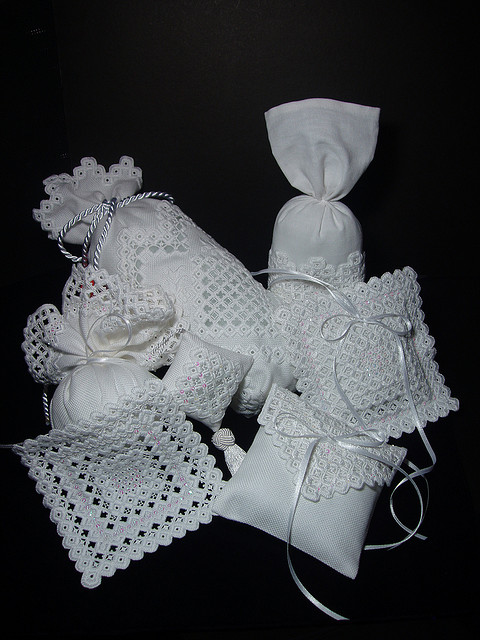
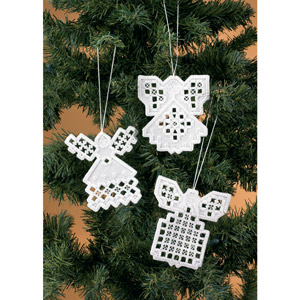
The designer embroidery method is also used for creating a lace-like pattern on various items like tablecloths, pillowcases, cushion covers, table mats as well as different articles of clothing. Another popular use of this embroidery is for making Christmas ornaments like snowflakes and angels.
A finished Hardanger Embroidery piece can be framed like other embroidery and cross stitch works to be used for indoor decoration.
Hardanger Embroidery Supplies
Here are the items you will need if you are about to learn working this embroidery technique:
- A Hardanger Embroidery pattern
- Embroidery frame for keeping you work even
- A tapestry needle
- Embroidery thread of the desired color
- hardanger fabric or white linen
How to Work Hardanger Embroidery
The procedure used for embroidering Hardanger is quite easy and is suitable for beginner embroiderers. Once you have all the tools and supplies necessary, you can start to embroider following the step-by-step instructions given below:
Satin Stitching Instructions
Here are the basic directions of how you can work the kloster block using the satin stitch:
- Place the hardanger fabric or white linen in your embroidery hoop to keep it tight and flat when you embroider. Take the needle and thread it with your embroidery thread.
- Begin stitching from the middle of your fabric. Pull your needle through the fabric, leaving a tail at its back. Make sure to hold on to the tail when stitching so that the thread so that you do not pull the fabric through mistakenly.
- Cover four threads of the fabric with a single satin stitch. Repeat this procedure five times so that you have a set of 5 satin stitches. The resultant block of stitches is known as kloster block.
- You need to work another kloster block with five more satin stitches. Make sure to begin the first stitch of this second stitching block opposite to the last stitch of the earlier kloster block. This allows you to form n ‘L’ shaped stitch block. Continue working in this opposite direction until you complete working all the five stitches. The following image will help you to understand the direction of the needle.
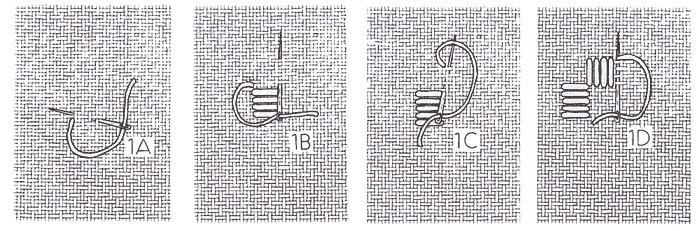
- Continue working in this manner, starting each kloster block in opposite direction from the last stitch of the earlier 5-stitch set. Repeat the Procedure until you complete the pattern. The pattern completes when the last stitch of your last kloster block meets the very first kloster block you worked.
Cutting Instructions
Here is how to cut the threads following the pattern:
- For cutting, you need to use the specific type of thread mentioned on the pattern you are going to use in your project. The threads used for cutting usually run across the satin stitch’s ends.
- In this step, you have to begin cutting the thread. Cut it close to your stitching but make sure not to cut parallel to your satin stitch.
- Remove all the loose threads to keep your work clean.
Weaving Instructions
Following are the steps for weaving the fabric thread bars with embroidery thread:
- Wrap the remaining fabric threads with the embroidery threads by weaving them in and out of your leftover fabric threads. Pass your needle over the 2 threads and then underneath the remaining two.
- In this step, turn your needle around to pass over the 2 threads that your needle went under in the earlier step.
- Repeat the first and second steps 3 and 1 half of your leftover fabric thread blocks are completely covered with embroidery thread. Count the total number of weaving stitches made for covering the fabric threads. You will need this number to know how many weaving stitches are necessary for covering the remaining fabric thread bars.
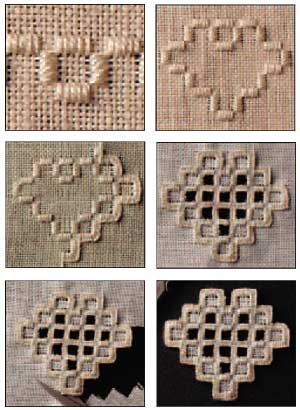
Using Webs
In the following steps, you will learn how to create the web-like designing your pattern:
- Complete the openings where you cut the fabric threads using square filets or webs. Once you complete weaving the 3 and 1 half bars, push your needle through the center of the adjoining bar and pull your thread through.
- Begin this step by threading the needle under the very thread that you just pulled through. Next you need to thread your needle through the center of the next bar.
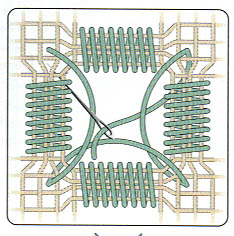
- Complete the webs in the first and second steps. Continue working until your needle reaches the spot where you started working the web. As a result, the openings in your project where you cut the fabric will have a web-like finish.
- At the end, you will have one half bar which you will have to weave for the remaining part of the pattern. Your pattern will complete once you finish working this step.
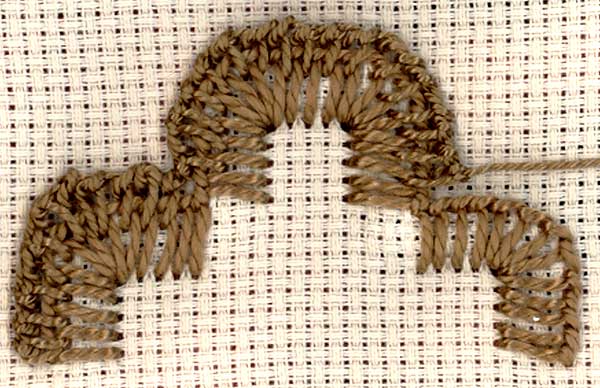
Typically, the edges of the Hardanger Embroidery are done with the buttonhole stitch. However, you can make stylish and interesting edges by combining straight buttonhole stitch or blanket stitch with a line of kloster blocks.
Points to Remember When Embroidering Hardanger
Now you know the basic procedure used for working the Hardanger Embroidery. But, you need to remember certain things to make sure you are working the design properly:
- Choosing the right fabric and thread is very important for creating even stitches, otherwise your project may end up looking like a tangle of thread.
- The weft and warp threads in the fabric used for the embroidery should similar, meaning the fabric should have an even, symmetrical weave. Heavy linen with regular weave is used for embroidering hardanger because the threads in this fabric are easier to count.
- It is advisable for beginners to choose simple patterns and use contrasting color embroidery thread as it makes it easier to see the stitches.
- Make sure to count the threads properly to produce an elegant lace-like embroidery pattern for your stitching project.
Working Hardanger Embroidery by Machine
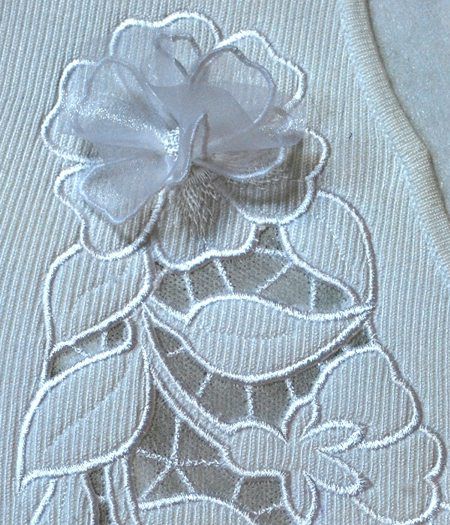
You can embroider different hardanger patterns by machine as well. All the stitching in the machine-embroidered hardanger is done using a sewing machine. However, hand-work is still involved in the procedure as your machine cannot work the cutting part required for completing the pattern.
For machine embroidery, you need to treat the design as a combination of free-standing embroidery and cutwork. Begin by hooping a suitable fabric using a water-soluble stabilizer and the outlines of any area you want to remove will be sewed in the design. Next, you need to take the hoop out of your machine and cut the fabric very carefully so that you do not cut through the stabilizer. Complete sewing the design before soaking out the stabilizer and your project will be complete. Machine embroidered hardanger looks very attractive on dressy clothes as well as fabric items like curtains and bed covers.
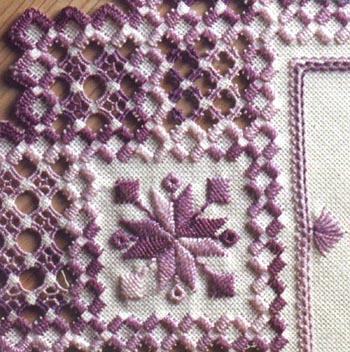
So, you have learnt how to embroider hardanger on a piece of fabric. You can work the design on white linen with white thread or can use contrasting colors of fabric and thread to produce beautiful multicolored items. Either way, the end product is sure to be worth your hard work.
Related Articles
Join Our Mailing List
Sign up to get the latest updates, along with fresh patterns and tutorials, right to your inbox