Hairpin Lace
Table of Contents
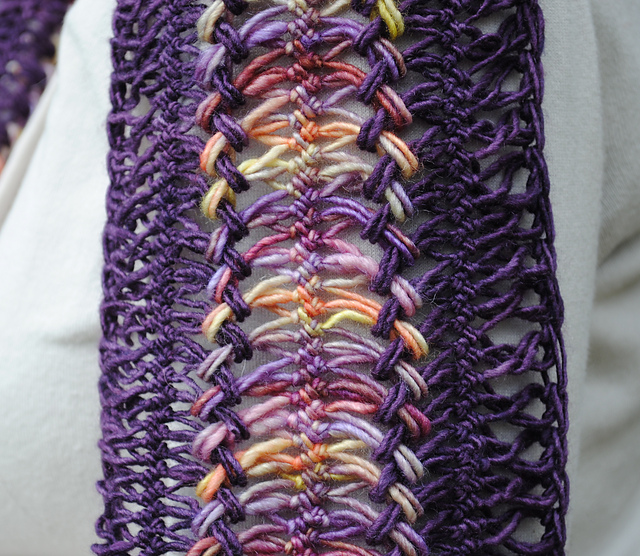
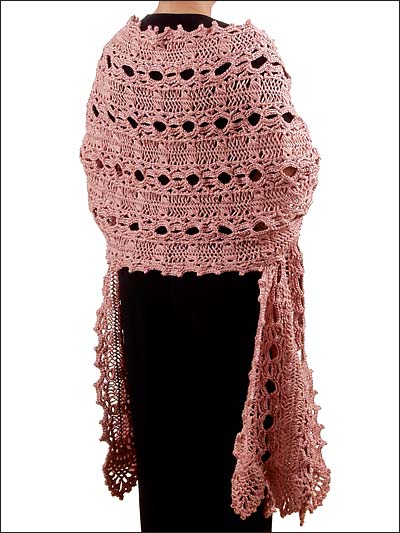
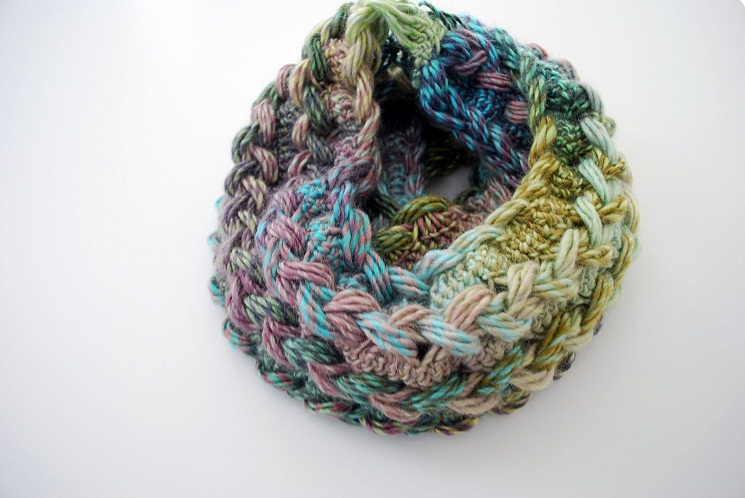
The hairpin lace is an easy crocheting technique that can produce delicate lacy patterns. There is a wide variety of garments and accessories that look great in this stitch, such as shawls and scarves. A loom is a tool that you will find indispensable for this type of crochet.
Hairpin Lace Crochet Tutorial
The instructions involve turning the loom from time to time. While doing this, you have to be very careful about the interchange of sides of the two prongs. That is why, before starting off you can label the left prong as A and the right one B using chalk or any other method that you find suitable. This will make your work easy.
Step 1: Make a slip knot with your yarn to secure it to the left prong of the hairpin lace loom. This prong is referred to as the home prong. Tighten up the loop so that the knot sits at the middle of the prongs.
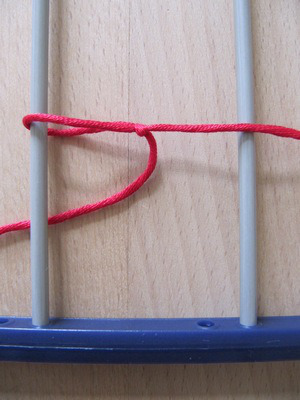
Step 2: Wrap your yarn over the right prong from the front to the back of the loom. Hold this working thread taut with your left hand.
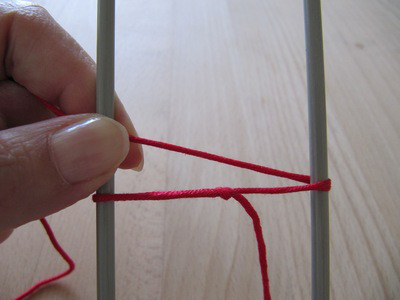
Step 3: Slip your crochet hook through the loop on the home prong from the bottom to the top.
Step 4: Pull out a loop of the thread held in your left hand, by making it pass through the loop mentioned in the previous step. Yarn over and make one chain stitch. This completes the first stitch of the hairpin lace. It is distinct from all the other stitches of the braid.
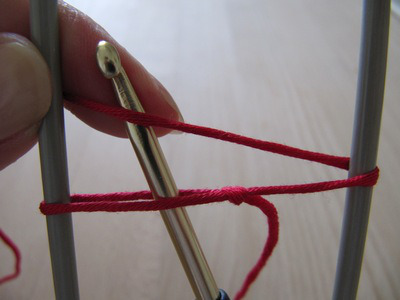
Step 5: Holding the loom and the working thread tight with your left hand, rotate the crochet hook anticlockwise to invert it. Your hook is still at the front of the loom, as it was all through.
Step 6: Grab the handle of the hook from behind the loom with your right hand and flip it up. Now your hook though upright, is at the back of the loom.
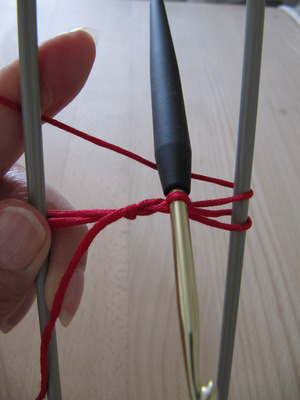
Step 7: Still maintaining tension on the working thread with your left hand, let your right hand be in possession of the loom. Now flip the loom by turning your right hand anticlockwise. Now you have your crochet hook again standing upright in front of the loom. Your left hand is at the back of the loom holding the working thread.
Step 8: For the second stitch, insert your hook into the loop that is sitting on the left prong from the bottom and let it come out of the top. Yarn over, pull up a loop, so that you have two loops on the hook. Yarn over and pull through both these loops.
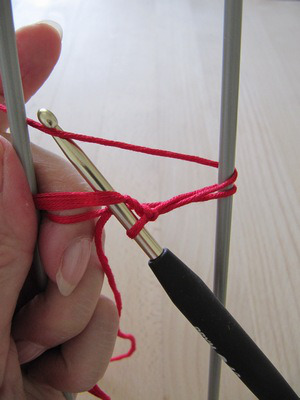
Step 9: Again flip the loom in the way described above and continue doing the stitches.
Step 10: Continue doing the loops on either side until you get the desired length of the strip. If there is no more space left in the loom, open its bottom frame and pull out some of the loops. You can insert a couple of safety yarns through the loops on either side so that they do not get tangled.

Hairpin Lace Pattern Video
Uses
The simplicity of the technique allows you to make afghans and wraps pretty fast. The patterns of some of the classy garments that you can make with this technique are enlisted here.

After reading these easy instructions, you are surely dying to lay your hands on a hairpin lace loom and get to work with your crochet hook. Since the pattern is quite repetitive, after getting comfortable you can chat or watch TV while working on it. Best of luck as you embark on the enjoyable journey.
Related Articles
Join Our Mailing List
Sign up to get the latest updates, along with fresh patterns and tutorials, right to your inbox