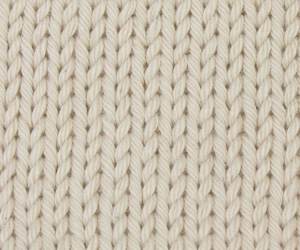
Stockinette Stitch
Table of Contents
Stockinette Stitch is a very popular and quite easy knitting pattern used for making various types of knitted materials. The smooth fabric created by this stitch makes it a natural choice for beginners. It can be knitted on straight needles, circular needles and crochet hooks.
What is Stockinette Stitch used for
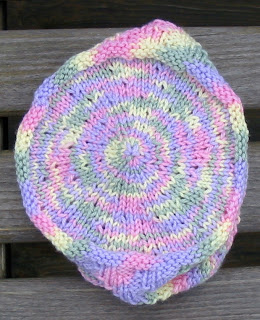
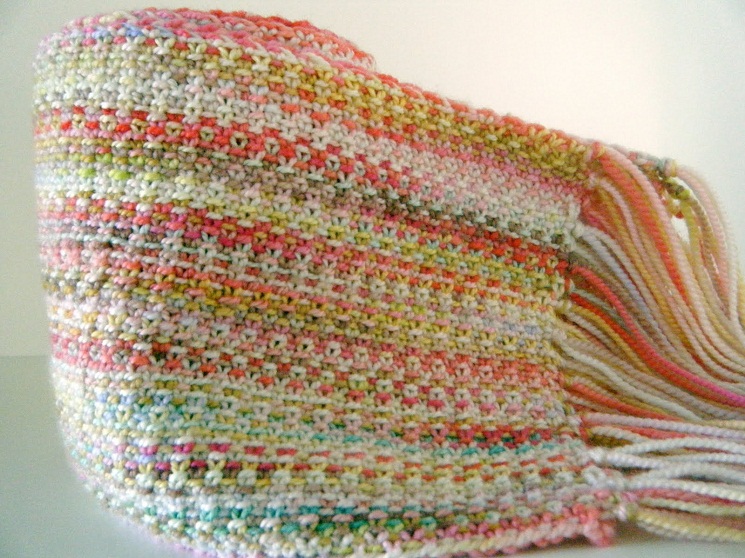
It is an ideal knitting pattern for making a range of woolen garments including sweaters, cardigans, scarves, hats, mufflers and socks. It is also very commonly used for making undergarments, baby blankets and infant clothing.
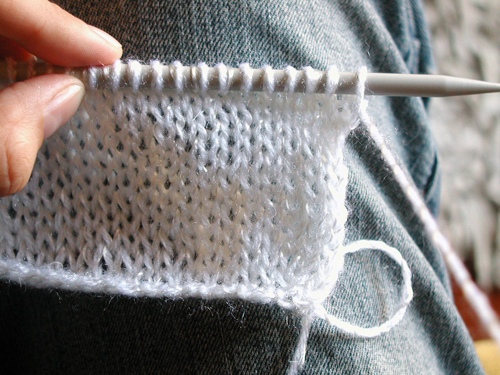
How to Knit Stockinette Stitch
Due to the simplicity of this knitting technique, it is counted among the most commonly used stitches. Here is the step by step instruction for knitting this pattern:
- Step 1: Cast the desirable number of stitches on your needle. Unlike many other knitting techniques, the Stockinette Stitch can be worked over any number of stitches.
- Step 2: Knit across all the stitches. Remember that this is the right side of your work. On the second row, you have to purl all the stitches. This side you are purling across is the back side or the wrong side of the work.
- Step 3: Continue in this manner, alternately knitting all the stitches on one row and then purling all the stitches on the next one. You have to work the row with knit stitches if the right side of your work is facing you and work purl stitches if the wrong side in facing you.
- Step 4: Bind off all the stitches once your fabric reaches the desired size and shape.
- Step 5: Observe the finished work to see if the purl row are looser compared to the knit rows. If so, you cans work the purl rows on a needle 1 size smaller.
So, the basic directions for knitting this pattern are as follows:
Row 1: *K (knit) all
Row 2: *P (purl) all
Row 3: Repeat row 1
Row 4: Repeat row 2
Reverse Stockinette Stitch: This is a variety of the regular Stockinette Stitch where you have to work on the kits and purl in a reversed order. It means, the first row will be worked with purls instead of knits while the second row will be worked with knits instead of purls. All the basic rules are same. So, knitting this pattern charts out as:
Row 1:*P (purl) all
Row 2: *K (knit) all
Row 3: Repeat row 1
Row 4: Repeat row 2
Double Sided Stockinette Stitch: You need to cast an even number of stitches on your needle. Then begin working the double sided pattern by knitting the first stitch, then bringing the yarn at the front between the needles and slipping the next stitch purlwise. Take the yarn between the needles to the back. Knit the entire row in this manner, ending with a slipped stitch. Repeat on all the rows.
Knitting Stockinette Stitch in the Round
You can easily knit this attractive stitch in the round using a circular needle or double pointed needles. First cast the required number of stitches on the needle. Then you can begin by either knitting or purling all stitches in every row. However, most patterns need to be started with knitting all stitches. While working this stitch in the round, you will always have to work on only one side of your fabric because the knitting is done circularly.
Stockinette Stitch Crochet
It can also be worked on crochet and is perfect for weaving afghan, scarves and mufflers. You can easily crochet this stitch by following these instructions:
- Begin with the desired number of stitches for the base row. Half double crochet (hdc) in third chain from the hook as well as every remaining chain across. For a well-draping piece of fabric, make sure to use a larger hook than the size you would normally use for the size of your yarn.
- In normal crochet, each stitch looks like a braid having a front loop and back loop when you look at it from above. In half double crochet there is a hidden 3rd loop.
- In the next stage, tilt the upper edge slightly toward yourself for revealing the hidden third loop of the hdc located behind your back loop.
- Yarn over and insert the hook in the 3rd loop for completing a half-double crochet in the usual manner.
- Now, continue by repeating the 3rd and 4th steps for all the stitches across. Once you are finished, the fabric will have a “braid” across its front side. This denotes the right side of your project.

How to Prevent the Curling of the Stockinette Stitch
Fabrics created using this knitting technique tends to curl at the edges. It is not possible to stop the edge stitches from curling up, which may ruin your project unless you take certain measures.
- You can use a non-curling stitch like the garter stitch, ribbing or moss stitch for knitting the borders and selvages of your project. Moss and garter stitches are ideal for the side selvages. However, ribbing is not commonly used for anything but the bottom edges or hem.
- You can knit around eight rows of one of the above-mentioned stitches for a flat lower border. Knitting 2 to4 moss or garter stitches at the starting and the end of every row can help you to create more stable selvages.
- Wet blocking the knitted article is another possible method of keeping your knitting project from curling. For this, you need to wet the knitted fabric properly, squeeze it gently and roll the piece in a towel. The next step is to press the towel along with the knitted fabric and then unroll it. Your knitted piece will become flat. But, this is only a temporary solution as the fabric tends to curl again after some time. If your knitted project is made of a non-washable or delicate yarn, you can use a spray bottle to dampen it.
- Another effective, but rarely used way of preventing the edges of your knitting work from curling is placing a lining on the wrong side of the material. A lining of stable fabric will help to flatten the Stockinette fabric. Make sure to use a fabric that is compatible with your yarn from which the Stockinette material is knit. Washable fabrics are most suitable for this purpose. It is important to wash the fabric prior to using it as the lining. Satin and velvet can be ideal for lining scarves made from silk or alpaca that may need dry cleaning for preventing shrinkage.
Stockinette stitch is one of the easiest and most useful knitting techniques you can apply to make almost any type of knitted material. It is sure to make your woven fabrics look attractive and elegant.
Related Articles

Join Our Mailing List
Sign up to get the latest updates, along with fresh patterns and tutorials, right to your inbox