Entrelac Knitting
Table of Contents
Entrelac is primarily a knitting technique that produces a complex basket weave texture on the knit fabric. But, the pattern can also be worked using crochet hooks. The word ‘Entrelac’ has a French origin (entrelacer), meaning ‘to interlace’ or intertwine – to be woven together.
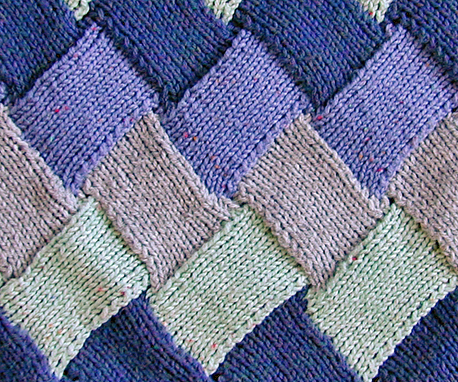
The gorgeously intricate design produced by the pattern makes it ideal for knitting woolen garments and accessories including sweaters, vests, shawls, mittens, socks, Afghans and woolen headbands.

How to knit entrelac step-by-step
Garter and stockinette stitches are commonly used for the method, but you can use other stitches once you get used to the pattern. If knitting in garter stitch, the blocks in your knit fabric will be more squarish than the rectangular blocks knit in stockinette. It is also possible to double knit the entrelac to produce reversible fabric, while you can work the pattern on a loom or any bulky knitting machine as well; but the following instruction is for hand knitting a basic entrelac sample.
Although originally meant to be knit in solid colors, using different colored yarn helps to better bring out the woven pattern. For beginners, it is recommended to use at least two colors as it helps to see the stitches.
The patterns consists of multiple tiers of rectangles pointing in the opposite direction with each tier worked at a time in the short know knitting technique. The following diagram shows the grain of stitches in the rectangles from each tier:
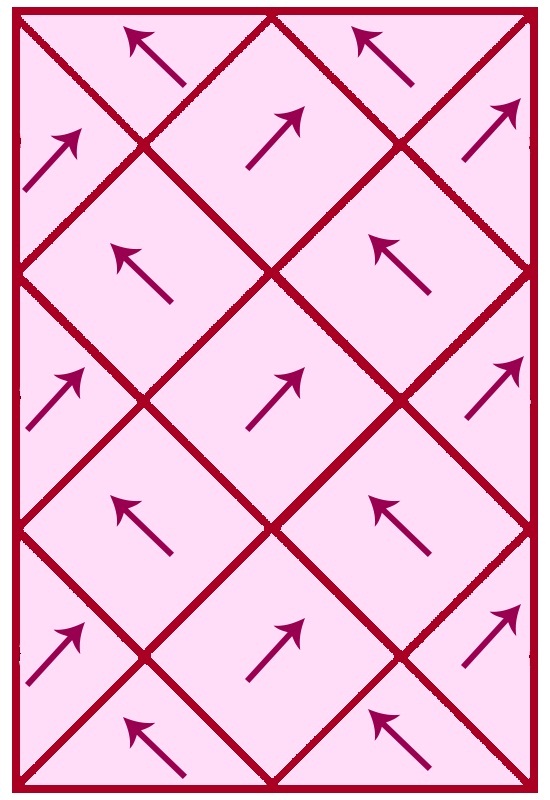
Entrelac Knitting Chart Diagram
Using a circular needle makes it a bit easier to work the pattern, but you can opt for straight needles if you are more comfortable with them.
It can be knit with any type of yarn; but, it is vital to use needles suitable for the yarn used. Before casting on, you need to calculate how many blocks you want in your fabric and how many stitches will be there in each block. In the following direction, there are 4 blocks with 6 stitches in each.
So, the total number of stitches to cast on is: 4 X 6 = 24 (casting on will be done in the color you want your foundation row to be or yarn A)
Once you complete casting on the stitches, it is time to start working on your foundation row triangles (the first row of triangles). There will be four foundation triangles in this sample.
Knitting instructions
For the foundation triangles:
Row 1: Purl the first 2 stitches and turn your work
Row 2: Knit those 2 stitches and turn
Row 3: Now, purl the first 3 stitches (the 2 you purled in row 1 plus the next one) and turn
Row 4: Knit those 3 stitches and turn
Row 5: Purl the first 4 stitches (the 3 you purled in row 3 and the next one) and turn
Row 6: Knit those 4 stitches
Row 7: Like rows 3 and 5, purl the first 5 stitches, and turn
Row 8: Knit those 5 stitches
Row 9: Like the earlier wrong side rows, purl the first 6 stitches, but this time do not turn to knit them
This completes the first foundation triangle.
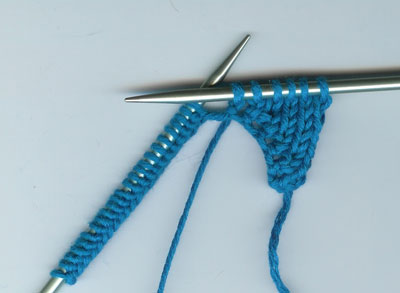
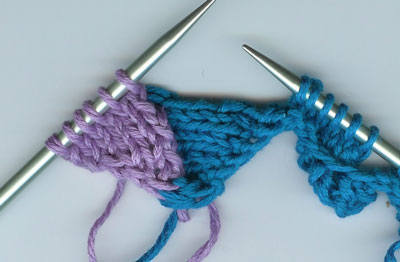
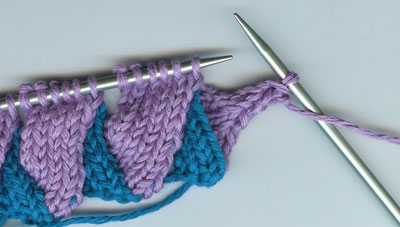
Now repeat from rows 1 to 7 with the next three 6-stitch sets. Once you are done, you will have something that looks like the picture below.
You might think you did something wrong by the messy look of your work at this stage, but the triangles will sort themselves as you start working on the first row of rectangles.
For the right side triangle:
Before you can begin the right side rectangles, you need to work a single right side triangle. Change the yarn if you are using different colors, turn your work and follow the instructions:
Row 1: Knit the first two stitches on the right side (you now have two stitches of the second color yarn or yarn B) and turn
Row 2: Purl those 2 stitches and turn
Row 3: Now, you need to knit into both the front and back (KFB) of your first stitch on the right side so you have 2 stitches on your right needle
Then slip the next two stitches (the last stitch of yarn B and the first one of yarn A) on you left needle and then knit those two together (SSK) to join your right side triangle with the nearest foundation triangle and turn
Row 4: Purl those three stitches and turn
Row 5: Like row 3, begin with a KFB, then knit to the last stitch of yarn B, SSK the last stitch of yarn B and the first one of yarn A and turn
Row 6: Purl the 4 stitches and turn
Row 7: Like in row 5, start with a KFB followed by purling to the last stitch (in this case just the second stitch on your left needle), an SSK and then turn
Row 8: Purl the 5 stitches and turn
Row 9: KFB, knit to the last stitch of yarn B and SSK the next 2 stitches, do not turn
You have now completed the right side triangle and are ready to start working on your right side rectangles.
For the right side rectangles:
For every rectangle, you will be picking up 6 stitches along the side of the triangle from the tier below.
Row 1: Pick up six stitches, knit them and turn (right side)
Row 2: Purl those 6 stitches and turn
Row 3: Knit the first 5 stitches on your left needle – that leaves the last stitch of yarn B. Now, as you did for the right side triangle, slip this last stitch of yarn B and the first stitch of yarn A (form the next set) to knit them together (SSK) to join the right side rectangle to the triangle below and turn
Row 4: Purl the 6 stitches and turn
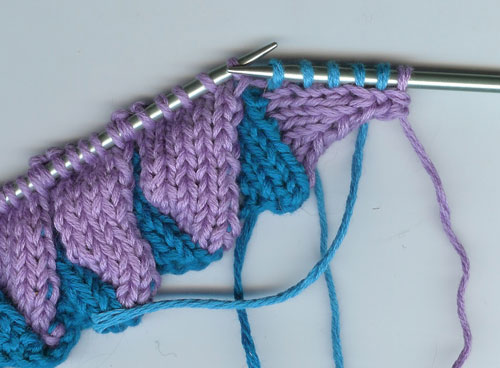
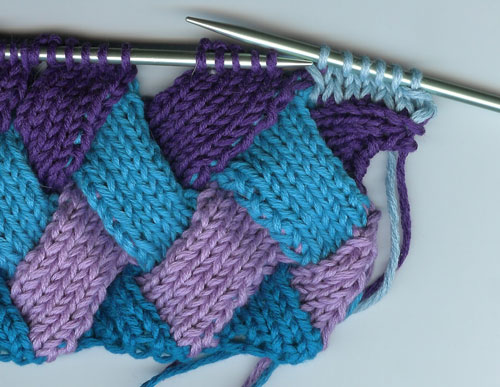
Repeat from row 2 to 4 until you finish working all the 6 stitches from the first foundation triangle and your first completed right side rectangle will look like the picture below:
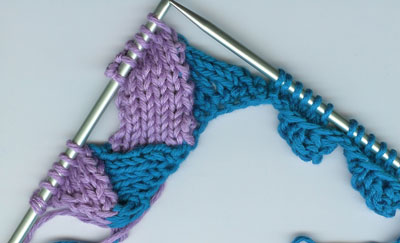
Make sure not to turn and purl the stitches once you finish a right side rectangle (all the stitches from the foundation triangle below has been worked).
Repeat from row 1 to work across the row to the last triangle from the foundation row. Once you have attached one right side rectangle to each of your foundation triangles (except for the left pointed triangle), you are ready to start working on the left side triangle.
For the left side triangle:
As you can see in the above picture, the last blue triangle is still hanging unattached. So in this step, you will be picking up 6 stitches along the outer edge of the triangle as you did for the right side rectangles.
Row 1: Pick up 6 stitches, knit them and turn (right side)
Row 2: Purl the first 2 stitches together (P2tog), then purl the rest of the stitches (4) and turn
Row 3: Knit all the stitches and turn
Row 4: Like in row 2, begin with a P2tog, knit the other stitches and turn
Row 5: knit all the 4 stitches and turn
Row 6: P2tog, purl the next 2 stitches and turn
Row 7: Knit the 3 stitches and turn
Row 8: P2tog, purl the only remaining stitch and turn
Row 9: Knit the 2 stitches, turn
Row 10: Purl the 2 remaining stitches together, do not turn. There will be only one stitch left on the right needle; you will be working with it in the next step
Now that the left side triangle is complete, it is time to start working on your wrong side rectangles.
For the wrong side rectangles:
In this step, you will be picking up only 5 stitches instead of 6 (as you did in all the earlier stages) because you already have one stitch left from the earlier step.
Row 1: Pick up 5 stitches and purl them (wrong side) so you have a total of 6 stitches on the right needle
Row 2: Knit all the 6 stitches and turn
Row 3: Now, purl the first 5 stitches on your left needle and then purl the next 2 together to join the first wrong side rectangle with the rectangle below and turn
Row 4: Knit and turn
Now, repeat from row 2 until the new 6-stitch set eats up all the stitches from the rectangle from the tier below
Do not turn your work to knit once you purl the sixth stitch and the last stitch from the rectangle below together.
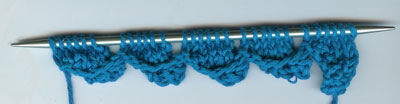
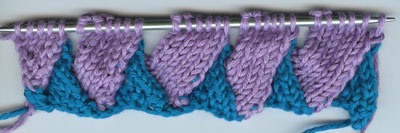
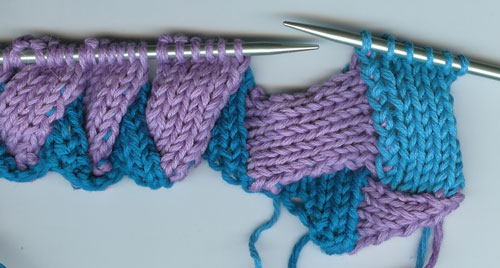
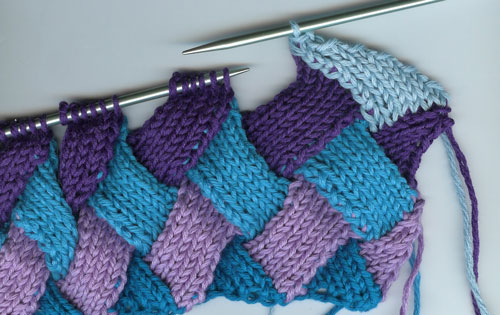
Then pick up 6 stitches and begin working from row 1 again until you have worked the last stitch from the last rectangle from the tier below. Unlike the first rectangle, you will need to pick up 6 stitches for the rest of the rectangles. The row of wrong side rectangles will look like the picture below:
Once the wrong side row is complete, you need to work another right side rectangle row, as you did earlier, before you can proceed to the bind off triangles.
For the bind off triangles:
Until now, you have been working with 6 stitches for all the triangles and rectangles. However, in the bind off row, you will be working with 6+1 = 7 stitches at a time.
Row 1: Pick up 6 stitches and purl them so you have a total of 7 stitches on your right needle (counting the 1 stitch you had from the last right side rectangle), turn (wrong side)
Row 2: Now purl the first 2 stitches together and then purl the next 4 before purling the next 2 together (to join the first bind off triangle with the rectangle below) and turn
Row 3: Knit all the stitches and turn
Row 4: As you did in row 2, P2tog, purl the next 3 stitches and then P2tog, turn
Row 5: Knit and turn
Row 6: P2tog, purl 2 and again P2tog, turn
Row 7: Knit the 4 stitches and turn
Row 8: P2tog, purl 1, P2tog and turn
Row 9: P2tog twice as there are only 4 stitches on your right needle. At this point you will one stitch left on your left needle from the rectangle below, turn
Row 10: Purl all the 3 stitches together (P3tog)
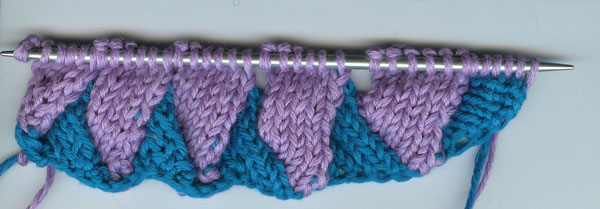
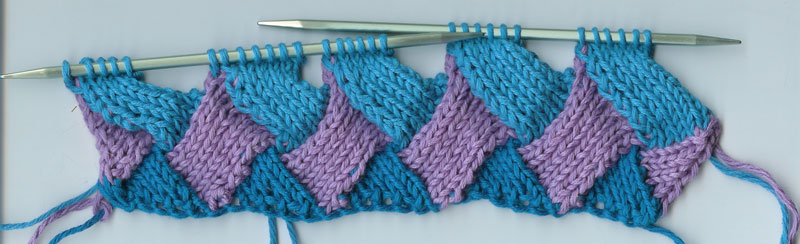
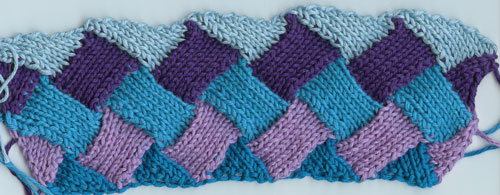
Your first bind off triangle is now complete. Now repeat from row 1 to 10 until you bind off all the stitches. You can avoid turning your work so many times by just knitting and purling backwards if you are comfortable with it.
You have knit your entrelac sample and now you are ready to use this amazing pattern in a real knitting project
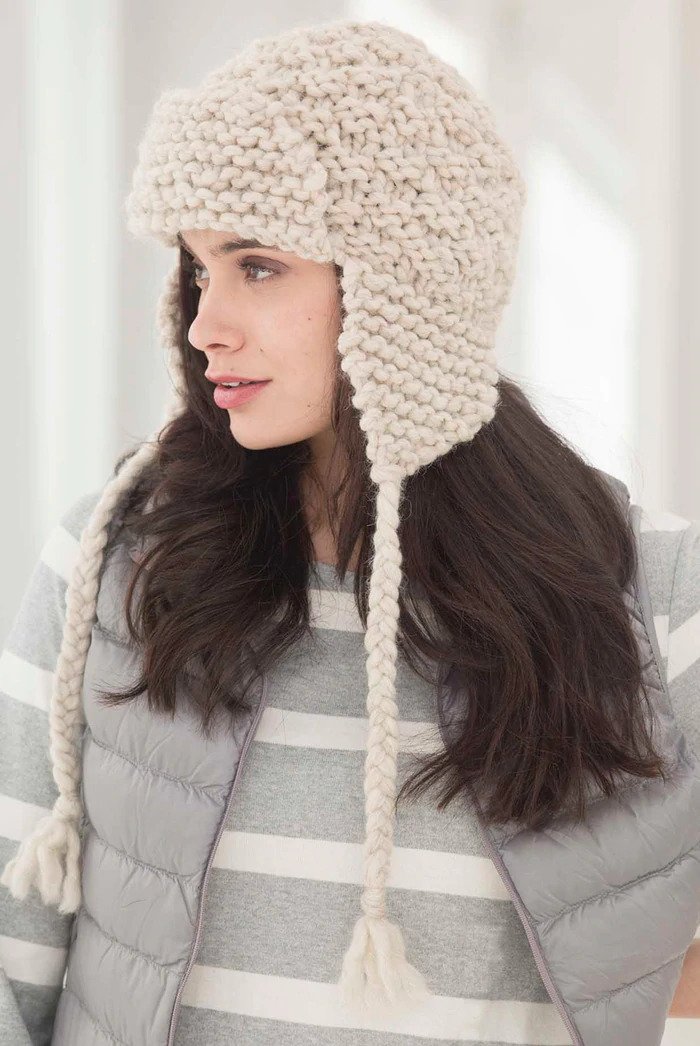
Once you excel in this flat pattern, you can go ahead and try entrelac in the round, which is commonly used for textured beanie hats, bags and stylish dishcloth. You might skip the side triangles when knitting in the round to make the pattern more even. Another beautiful variety often used for knitting scarves, baby blankets and cushion covers is the seamless entrelac.
Related Articles
Join Our Mailing List
Sign up to get the latest updates, along with fresh patterns and tutorials, right to your inbox